When asked to have a craft stall at the local school I knew that my price points would be too high however I really did want to contribute so I decided to make some moulds that I could use to make some quick and simple cabochons.
Rather than use expensive mould makers I decided to use a much cheaper and accessible material, Zubber. It is sold at most toy stores and the pack shown below was from Toys'R'Us and it is currently under £2.00.
It is intended for children and is incredibly easy to use as you will see in the next few photographs. You get two tubs of coloured Zubber and a white tub of the activator, two measuring scoops and a plastic plate that you can make rubber charms with (not pictured because it is not used in this tutorial). I also selected some shaped buttons from my daughters button box which I am going to use to make the moulds. They can be plastic, wood, metal, anything you can think of really that you like the shape of.
To activate the Zubber you need to use an equal amount of colour and white, measure them using the spoons provided. Only mix a little at a time because once they are mixed you don't have much time to work with them before they start to set.
Simply mix them together as quickly as possible until you have a ball of one solid colour (this is the same process no matter what colour you use), they will not set properly if they are not completely mixed in. It is pretty easy to mix because it is really soft and has an oily texture before it sets.
Press your button into the Zubber so that it goes a little higher than the edge of the button. Be sure to make sure that you CAN'T feel the button through the bottom of the Zubber because if your mould is too thin it will split at the bottom when you try to remove your clay.
I used the tray inside the box to hold the Zubber whilst it set. This picture shows how many moulds I made from one whole pack of Zubber. The instructions say that they should be set in ten minutes however I wanted to be sure to have as much detail as possible so I left mine to set overnight.
Then I simply popped the buttons out, gave them a wipe and put them away. The moulds are now ready to use with polymer clay.
Fill the mould with polymer clay and be sure to push it in as firm as possible. I find that you get the best results if you squeeze the sides of the moulds too.
Cut off the excess clay with a sharp blade and then gently pop out the clay from the mould and bake as per the instructions.
I added eyes and noses where appropriate with tiny pieces of clay. The photo above shows some of the clay that has been baked. You now have usable cabochons that can be quickly and easily replicated over and over again to make inexpensive but handcrafted Jewellery or art.
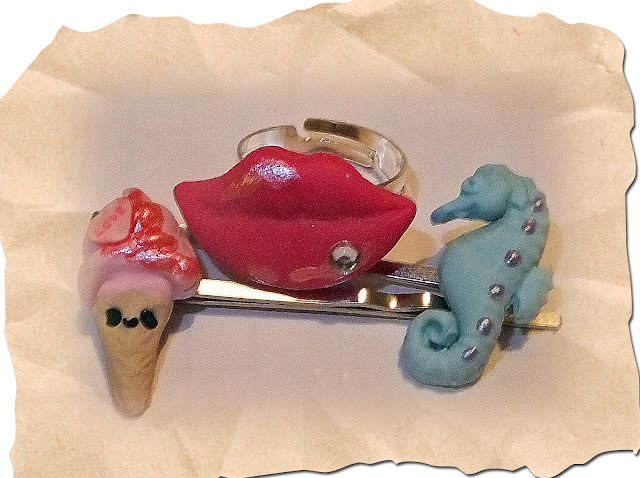
And I decorated the cabochons with clay canes, 3d paint, sparkles and glitter, anything I could get my hands on really. I added them to rings and hair clips all ready for the fair and at half the price of my none moulded creations.
I hope that this tutorial helps and possibly inspires, Love Sam xxx


